Twig & Shortcut Syntax in the Craft CMS Control Panel
Customize Craft settings with dynamic Twig and shortcut syntax code. Create a better authoring experience and tailor the site setup to your needs.

We usually write Twig in our front-end templates; it’s the templating language that brings the data stored in Craft CMS to the browser. However, we can use it – and its cousin Craft’s shortcut syntax – to dynamically customize some settings in the Craft CMS control panel.
Can I really use Twig Code in the Craft Control Panel? #
Yes, there are specific settings input fields in the control panel that are “mini Twig templates,” as described in the official Craft documentation, and accept Twig code or Craft’s shortcut syntax.
It’s the same Twig that you’re used to using in your templates. Use the standard Twig syntax for statement and output tags. You can write element queries, loop over arrays, use conditionals, and output data. All global variables are also available.
You already use Twig code in your settings, but you might not realize it. All Craft sections have a Site Settings area where you define the Entry URI Format. The default URL format is sectionname/{slug}. The {slug} is Craft’s shortcut syntax for {{ object.slug }}, which you can also use in the settings field. This refers to the slug of the current entry being saved or accessed.

We can do this because Craft provides these settings fields implicit access to the data of the element (in this case, an entry) being saved via the object variable. This means we can access all properties (like title, url, slug) and use them in our Twig code. This opens up many opportunities for dynamically customizing URLs, titles, and more.
What is the Craft Shortcut Syntax?
Shortcut syntax is a more straightforward way to output commonly used data in Craft CMS without writing Twig. Craft turns it into Twig before parsing it, but it exists to make some common uses simpler. Instead of typing the object variable that Craft provides, it’s implied.
One nicety with the shortcut syntax is that Twig filters are available, so you can manipulate the data right inside the curly braces, like to format a date:
{postDate | date('Y')}
In this code example, the object variable is implied, but this code would work exactly the same:
{object.postDate | date('Y')}
If you are working with an entry, you might think of this as using entry.title in a single entry Twig template.
Should you use the shortcut syntax? I don’t think it is necessary and the characters saved aren’t worth the confusion two different syntaxes (Twig and shortcut) could cause. My recommendation is to skip the shortcut syntax and use standard Twig instead. You can do more, and it matches what you write in your templates anyway.
Where Can I use Twig in the Craft Control Panel? #
The “mini Twig templates” are available in the following Craft control panel locations:
- Section Settings: URI format, Preview targets
- Field Layouts: dynamic titles
- Asset Fields: custom upload locations
- Any plugins with support, like SEOmatic and its special Twig input fields with autocomplete powered by the Twigfield editor.
Creating Custom Entry URIs with Twig #
By default, Craft will create an entry URI that is the section handle (not camel-cased) followed by the entry slug. E.g. adventures/big-bend. But we can customize this entry URI format using Twig.

We want our entry URI format to have the chosen category’s slug in it as the second segment of the URI: /adventures/big-bend/some-entry-slug and then followed by the entry slug. Segment one is hard coded based on the section name, segment two is the chosen category slug for that entry, and the third segment is the slug for the entry.
But we don’t know what our category will be or what the entry slug will be, so we need to put variables there as placeholders. Those variables will be replaced with the entry data after the entry is created.
Since the location category field data is returned as an array, we want to access it as such. Our Twig code to accomplish this would be:
adventures/{{ object.locations[0].slug }}/{{ object.slug }}

The first segment with adventures is hard-coded because we’re in a channel section called “Adventures,” and I want that in my URL. The code object.locations[0].slug refers to the entry object of the currently saved entry (think about this code running while Craft is saving an entry), and locations are the handle for the category field in the adventures field layout. We use the zero index because I want the first (and, in this case, only category) from that array of categories. Finally, the slug property on the location outputs the hyphenated, URL-safe slug for that category.

The end result is that an adventure section entry with the location category of “Austin, TX” has the URI adventures/austin-tx/my-grand-adventure.

For the sake of completeness, here’s the same setting but with the shortcut syntax:
adventures/{locations[0].slug}/{slug}
Whatever you can do in Twig in your template, you can do in this settings field to make your URI exactly how you want. You can customize it with custom field data, post date data, and manipulate it with Twig filters.
Dynamic Entry Titles with Twig #
In a field layout for a Craft CMS section, we can hide the required Title field and automatically populate it with whatever data we want. This is very helpful when the title won’t be used on the front end but needs to make sense to the content authors. Rather than make content authors input the title field data, we can generate it automatically using Twig.
The Scenario
Over in the Real World Craft CMS course, we’re creating a site that offers trail running adventure trips. Part of the content requirements for that site is that we have testimonials of past attendees.
I want to make the content authoring experience as lovely as possible, eliminating the need to fill out any fields that a machine and software could do better.
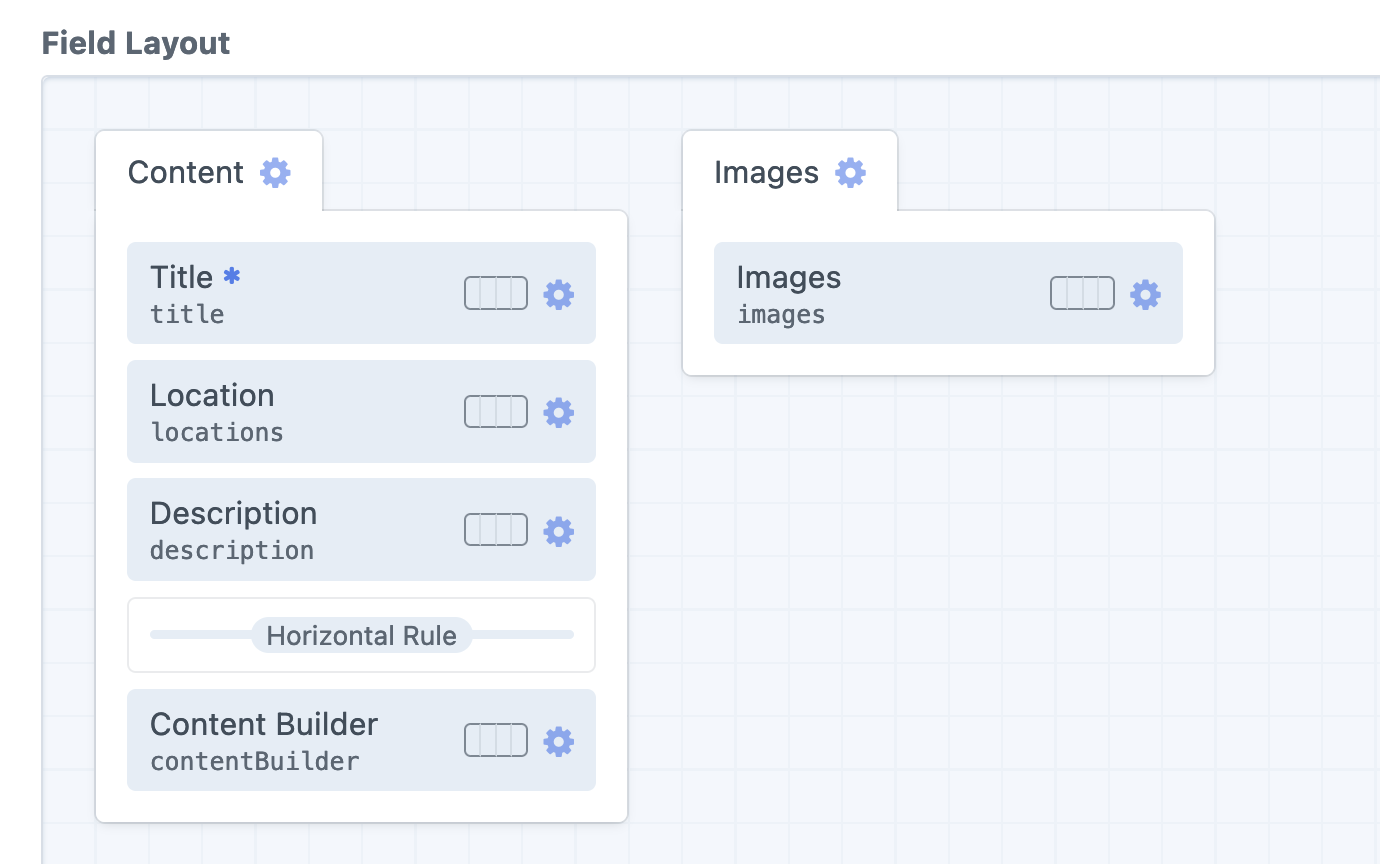
We store the testimonials in a channel section called Testimonials (handle: testimonials). Our testimonials section has:
- one default entry type
- three fields
- title
- testimonial copy (plain text)
- testimonial byline (table field with two columns, Full Name, and Location)

We will disable the title field since it’s meaningless to the authors, but it needs to be populated with something that makes sense when you view it on the element listing view in the Craft control panel.
We disable the title field by unchecking the “Show the Title Field” checkbox. A new input field appears called “Title Format,” and this is another one of our special mini twig templates. Every entry in Craft needs a title, even if it’s something you hard code. But we will dynamically create a title based on entry data (or any globally available data via Craft’s globals) using Twig code!

We can put any Twig code in this settings field, even nonsense like this:
{% for num in 0..3 %} {{num}} {% endfor %}
But I need something meaningful in this field, like the full name of the testimonial giver.
The name of the person giving the testimonial is stored in the testimonial byline field. This field is a table field, so I automatically think I need to iterate over the rows of data:
{% for byline in object.testimonialByline %} {{byline.fullName }} {% endfor %}
The object variable here is the entry data of the entry being saved. Using object.testimonialByline would be the equivalent of entry.testimonialByline in an individual entry template.
Since we’re just dealing with Twig, even the for-loop is unnecessary because we can access the table rows by the array index. In this case, the table field is limited to 1 row only. That means we can reliably access the row by the index and always get the row I need:
{{ object.testimonialByline[0].fullName }}
This produces the same result!
Finally, we can discard the object variable and just reference properties of the entry directly because object is implied:
{{ testimonialByline[0].fullName }}
Again, for the sake of completeness, this will look almost the same in Craft’s shortcut syntax:
{testmonialByline[0].fullName}}
Dynamic Asset Subdirectory Names #
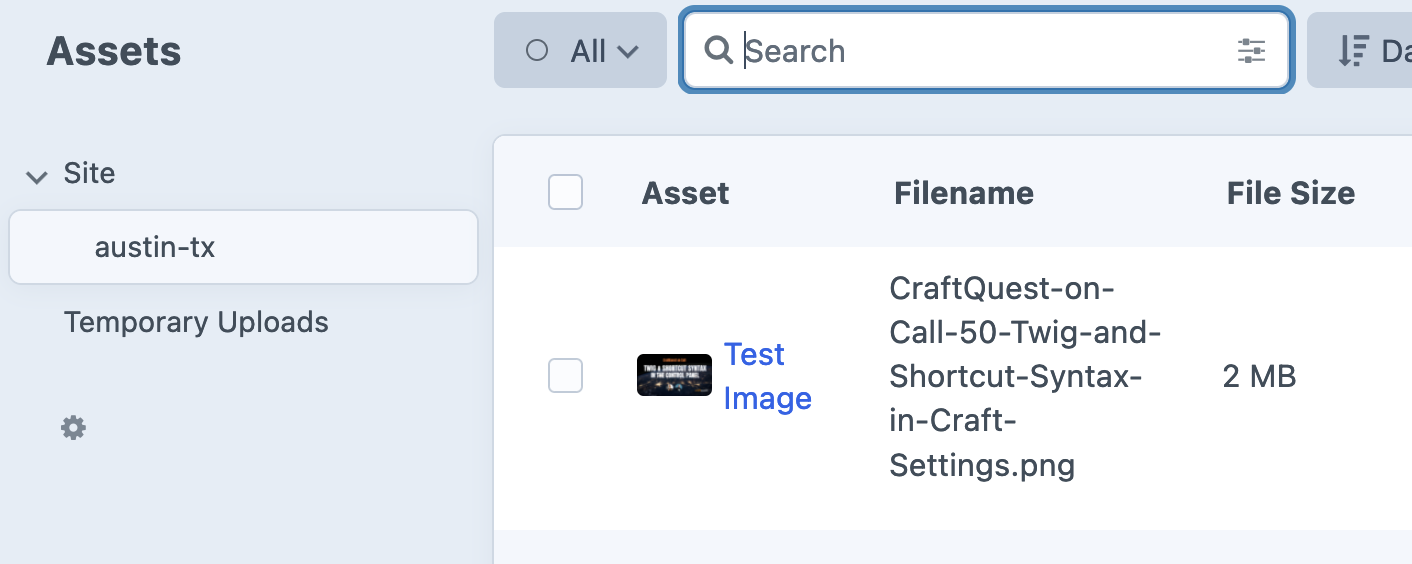
In our first example, we used the location category slug to create a custom entry URI format. Let’s use that same approach to create dynamic subdirectories for assets uploaded for an adventure entry. If an asset is uploaded within an adventure entry, and it has the location category slug of austin-tx, then we’ll create a subdirectory in our asset volume with the same name and store the file there.
We do this work in the field settings for the asset field in the adventure default entry type field layout.

We write our Twig code in the settings for the Images field under “Default Upload Location.”

The Default Upload Location field accepts both the shortcut and Twig code. Since we have access to all global data and the object variable for the current entry, we can customize this just as we did the entry URI format.
We can use a for-loop to output the category slug:
{% for location in object.locations.all() %} {{ location.slug }} {% endfor %}
We can also simplify this code to just access the category via the array index instead of looping over the array:
{{ object.locations[0].slug }}

And the result is that the file is uploaded to the austin-tx subdirectory:

Go Forth and Customize #
We didn’t implement all of the settings that are available, but you can customize your URI format, preview targets, entry titles, and asset field upload locations. Additionally, plugins can offer this same functionality and even supercharge it as SEOmatic does with its clever Twig input fields.
Additional Resources #
- Video course: Twig & Shortcut Syntax in the Control Panel
- Craft CMS Docs: Entry URI Formats
- Craft CMS Docs: Preview Targets
- Craft CMS Docs: Dynamic Entry Titles
- Livestream: CraftQuest on Call 50: Twig in the Control Panel